 The transition to the winter greenhouse garden continues....
We removed most of the cold intolerant plants, but kept a few Thai pepper plants that had some flowers and fruits on them, and they are still doing great. Frankly, I was happy to get rid of tomatoes for the year. My wife transplanted the broccoli and brussel sprouts into the ground bed that I started in flats, and she filled the rest of the ground bed with spinach, lettuce, carrots and radishes.
As far as projects to transition to the winter greenhouse, I installed two 55-gallon metal drums filled with water to act as a heat sink and thermal mass, but also to provide water for our watering needs. It was gratifying to fill these from our rain barrels, and this begins the winterizing of our rain barrels and their transition to downspouts for the winter.
 Unlike the plastic olive barrels we use for rain water harvesting, the barrels we re using in the greenhouse are metal (for thermal conductance), black (for solar gain), and also act as good shelving and work surfaces. These are reused drums (clean) and are about $20 from Axmen
We’ll see how these work, only having 110 gallons of water will not provide nearly enough BTU’s to maintain the greenhouse above freezing alone, but coupled with other features, hopefully it is enough to provide benefits. Water, though a good heat sink, would need to be in a volume close to 500 gallons, based on the square feet of glazing and insulative value of my greenhouse, to have a significant effect if that was the only thing I was relying on to keep temperatures moderate. If nothing else, however, the metal drums do act as shelving and storage for water.
Other changes for the winter:
I disconnected the solar window opener on the east window, and covered the east and north window with 2” rigid insulation, the silver film will also reflect a bit more light to the greenhouse.
As far as projects to transition to the winter greenhouse, I installed two 55-gallon metal drums filled with water to act as a heat sink and thermal mass, but also to provide water for our watering needs. It was gratifying to fill these from our rain barrels, and this begins the winterizing of our rain barrels and their transition to downspouts for the winter.
Unlike the plastic olive barrels we use for rain water harvesting, the barrels we re using in the greenhouse are metal (for thermal conductance), black (for solar gain), and also act as good shelving and work surfaces. These are reused drums (clean) and are about $20 from AxmenWe’ll see how these work, only having 110 gallons of water will not provide nearly enough BTU’s to maintain the greenhouse above freezing alone, but coupled with other features, hopefully it is enough to provide benefits. Water, though a good heat sink, would need to be in a volume close to 500 gallons, based on the square feet of glazing and insulative value of my greenhouse, to have a significant effect if that was the only thing I was relying on to keep temperatures moderate. If nothing else, however, the metal drums do act as shelving and storage for water.
Other changes for the winter:
I disconnected the solar window opener on the east window, and covered the east and north window with 2” rigid insulation, the silver film will also reflect a bit more light to the greenhouse.

I installed a cold frame over 1/2 of the ground bed (see below). This is essentially a greenhouse inside the greenhouse. We'll see how it works, and I'll probably cover the other half of the ground bed- but right now it is an experiment- stay tuned for temperature data.
 Left to do:
Install solar pool cover to south facing glazing
Install storm door
Install storm door
Activate the compost furnace
More posts coming soon...
 “What can I plant that the deer won’t eat?”
 With temperatures expected to be around 6° F in the next a few days (yikes!), it is time to transition the greenhouse from summer to winter. Right now, the greenhouse is over filled with Thai peppers, eggplants, basil and tomatoes - all plants that are not too cold tolerant. Some of these plants are in the ground beds in the greenhouse, some are in pots that we had growing outside this summer.
 It is still very warm in the greenhouse during the day when the air temperatures have been in the 40's. Our goal is to grow hardy cool season vegetables in the greenhouse in the winter.

 these will go into the ground bed, once the tomatoes, eggplants and peppers are done. Next up (maybe tonight) I'll start spinach and lettuce that we'll grow in flats on the greenhouse shelves. Later, we'll plant radishes, carrots and the broccoli and brussel sprout starts in the ground bed. I will also make a cold frame for the in ground bed- this will add more insulation for those vegetables (about 10 degrees F, or about 1 zone). I also need to add a solar pool cover for insulation to the glazed south wall, and some metal 50 gallon drums to the north side for water and solar mass. Soon we activate our compost furnace - stay tuned for the results there.
 Rolling up our lawn was the first thing we did when we moved into this house in 1999.
 I used to have a (front) lawn, but now I have a short grass prairie with over 80 plant species native to the Missoula valley

 It is constantly changing, and interesting all year long.
 I used to have a lawn in the backyard, too...

 I used to have a lawn, but now I have prairie crocus,
 a greenhouse,


 This is a fun time to celebrate the dormancy of plants. Although there my be the temptation to water some plants, try to avoid watering and make a make a native garden something it is not, embrace the changes.
 This is a fun time of the year to prune, dead head and do some garden maintenance. It is a time to build brush piles for wildlife, and to leave seeds for birds to eats in the winter.
 Some recent rains have given new life to some plants. The elkhorn clarkias (Clarkia pulchella) and yellow evening primroses (Oenethera flava) have returned from dormancy and begun flowering (see photo below), some blue flax (Linum lewisii), blanket flowers (Gallarida aristata), and asters (Aster and Erigerion spp.) have also started flowering again.
  These small bits of color are made more extreme in contrast to the shades of brown. The browns, though, look and feel more natural this time of year, and give the garden a proper sense of place and season. Bright green irrigated lawns look that much more out of place in the west in autumn.
  Phase 2 of the Pocket park is about to begin (a photo of the adjacent Phase 1 is above and click
  Below is the landscape plan for this part of the park. The main element in this next phase is a horseshoe court, as well as native plants. Starting this Wednesday night (7-8 pm) we will be preparing the site. Wednesday nights around 7 pm, will probably be a regular day and time to work on the garden, until hunting season, that is, and I guess until it gets dark. OK, so the dates and time could change, so, contact
 The 8th Street Pocket Park is a small neighborhood park that uses native plants and landscaping to provide education and outreach to neighbors and students that my wife and I have been working on for the last couple of years. Because of its small size and out of the way location, this little piece of ground was neglected, growing only knapweed (Centaurea stoebe) and dog waste (no Latin binomial necessary). Located between an irrigation ditch and the intersection of 8th and Grant streets, the entire "park" was located in the city's right of way. A few neighbors saw an opportunity to work together and develop a wildflower garden, providing beauty and benefits to the nearby school and surrounding neighborhood.
 Below is a picture of the same area in August 2009, after just one year of growth.
 Again, the same location one year later.
 This is one of the only "before" pictures we have. Again, you can never take too many pictures before you begin a project- I never take enough (see my lament
  This picture is taken roughly the same location in early spring 2009, and if you look closely you can see a black-capped chickadee on the nest box. This spring a pair excavated this box and raised a clutch- success!
 Below is roughly the same location in August 2009- plants thrived, despite no irrigation in 2009.

 Also pictured above is a National Wildlife Federation wildlife habitat sign. This park is certified as

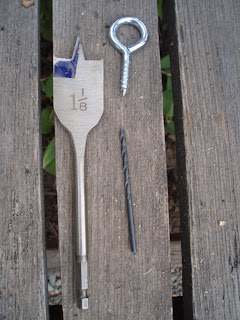


 Then, bore out holes for the suet. Place as many as you'd like, and drill them about 1" deep. Try to keep the upper holes at least 4" from the top, so non-native birds won't be able to perch on the top and reach down into the holes.
 Load the cavities with suet- it is easiest, but messiest to do this when the suet is room temperature.
 Install and watch for birds- let me know how they work.