
I posted a slideshow depicting my little green roof project last week (click here) and this is a follow up with some details about its construction and the plants I used.
Building this "green" or "living" roof was a really fun weekend project and one that I have been thinking about for a long time. My initial thoughts about green roofs came about from discussions with Kevin DePuy of Adapt Design + Build. He and I have talked about putting a green roof on the entrance to the Home ReSource building, and we each expressed our desire to try some new things; I wanted to try native plants, and Kevin was looking at it from a building perspective- about making some low-cost green roof solutions for a variety of roof pitches.
So after some thinking and reading books about green roofs this winter, I figured the best way to learn is to try it, literally, in my own backyard. What I learn here, I will hopefully incorporate into the green roof at Home ReSource, but really, I want to add a green roof to my garage (that will be Phase 2!).

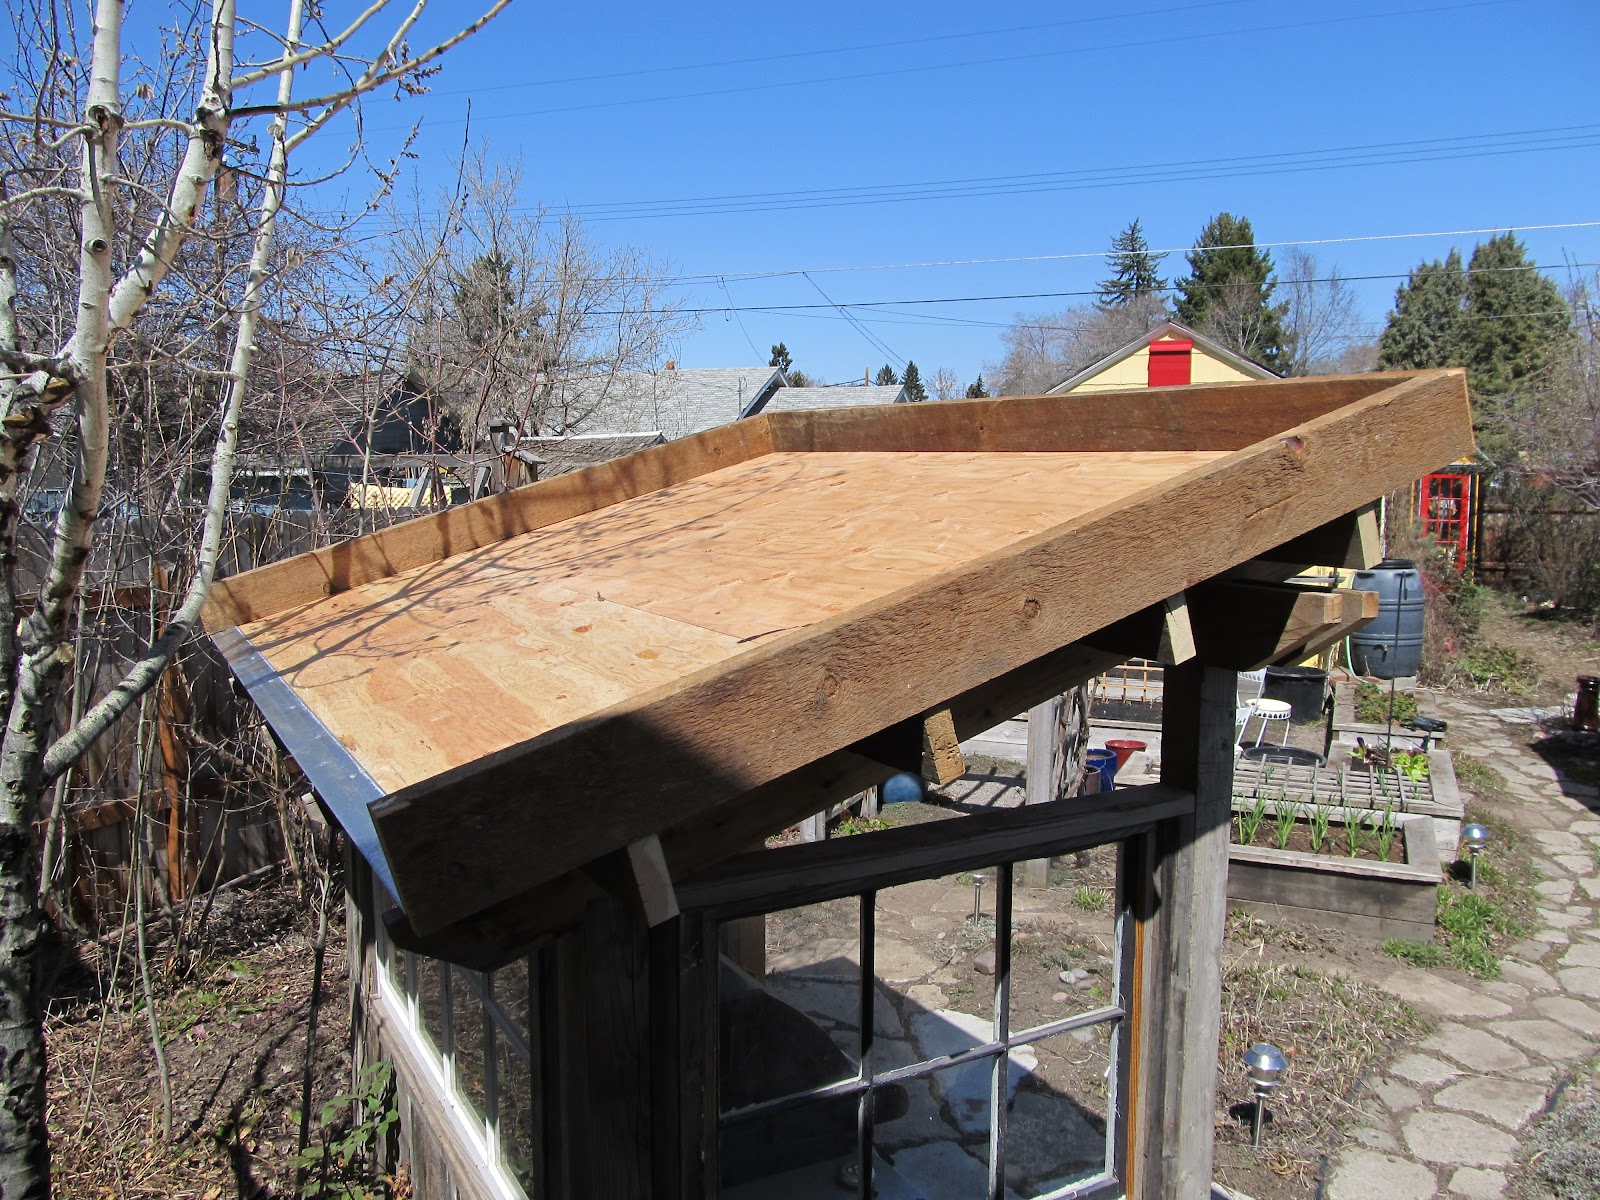
Roof construction
The first step in this project was removing the metal roof (it went back to Home ReSource, where I will probably end up buying it again!), and reinforcing the framing to bear the weight of the new roof.


I added about 2” of gravel to the roof, and the reason I fully enclosed it was so the roots did not penetrate it, and so the gravel wouoldn’t shift or fall out of the drainage in the roof.


On top of the landscape fabric I added a rooting media. There are a lot of differing options and opinions on soil mixes for green roofs, and this is one area I wanted to experiment with. Over the course of mixing it and applying it, I changed the ratio a few times. My initial plan was to use equal parts of compost, pumice, and perlite. The whole idea is to have a light weight soil mixture, that has a fair amount of volume for roots, but drains well, and does not contain too many organics. Although I considered using other materials like sphagnum peat, crushed Styrofoam and others, I eventually ruled them out. As this progressed, I eventually stopped using compost- I was afraid of too much nutrients for the plants and the compost I also feared might hold too much water (for weight), and I switched to composted bark mulch (soil pep) and perlite.


I really wanted to use native plants for a green roof, and that is how this whole thing got started. We’ll see how my selection goes, but my goal is to find a mixture that includes a diversity of plant species (read: not all sedum, like many green roofs), for human interest, wildlife (insects and the like) value and aesthesis, low rooting depth (that is, no taproots), fibrous roots that with help to bind the soil, plants that seed prolifically (to fill in the roof), a diversity of heights and textures, drought tolerant, plants that are easy to grow, species that are commercially available, and plants that are relatively low growing.
- Prairie June grass (Koeleria macrantha), bunchgrass, prolific seeder, deepest root depth of the group
- Yarrow (Achillea millefolium), forms a mat and spreads with rhizomes, tallest plant (when in flower)
- Rosy pussytoes (Anntenaria rosea) - forms a mat and spreads, their light foliage reflects sun
- Cutleaf daisy (Erigeron compositus) - these form a low mat and flower for a long time (starting in April)
- Lanceleaf stonecrop (Sedum lanceolatum). I used sedum because it is a requirement on any green roof. It is mandatory. And they enforce this. A nice succulent, though.
-


I'll post updates about the successes (or failures) and we'll see how it goes.
Wow, too amazing!!! I am in Kalispell and stumbled across your blog. It has been so helpful in my new songbird garden plans!! As regards drainage on your roof, and as opposed to gravel, what would you think about repurposing the plastic grids used to diffuse flourescent lighting in drop down ceilings? (ugly old things, anyway!!)You would get, what, a centimeter or so of depth, and they could be stacked on top of each other...just an idea.
ReplyDeleteHi Mobius,
ReplyDeleteThanks so much- I'm really glad you've been enjoying my blog. That is a good idea about the plastic grids, my only concern is that they don't really allow water to drain, they might just compartmentalize the water (if that makes any sense). I've been trying to think of something like that that could be re-purposed, something like the shape of an egg carton (only not made out of cardboard!). Thanks again!
David
Hi! Why are you using sand on the roof? It's too heavy. You'd better use something specifically engineered for green roofs. Like CitySoil www.citysoil.ca or any other Green roof growing media.
ReplyDeleteThanks for the comment, but I didn't use sand in the growing media, mainly perlite, pumice, compost and composted bark mulch. The growing media is really light- growing media is the easy part. I wanted to try to come up with a rooting/ growing media that was inexpensive and locally available, with local materials(ingredients I used were from Idaho and Montana). I am sure the Canadian company you suggested is great, but not really practical, nor an efficient use of resources to deliver to here or other parts of the country.
ReplyDeleteI did use gravel for drainage, and I agree this is heavy, and like I said in the post, I probably would not use gravel again, though it is cheap, effective and readily available (at least in this part of the state!).
Thanks again,
David
Very cool idea. Keep us posted.
ReplyDeleteVery innovative! The grill shed looks 100% better when it has plants on the roof. Putting greens on the roof is not actually new, it's already in use for hundreds of years in Norway. But seeing this technique being given a new life is definitely heartwarming. I hope many more would follow your example.
ReplyDeleteHow is your roof holding up? I'm in the process of building mine on our chicken coop. I'm using some of your steps but am not sure if I want to go with gravel. Can you list anything that you would do different?
ReplyDeleteHi Cobia,
ReplyDeleteThanks for the comments and for your interest. The green roof is doing well. Gravel is kind of hard to beat, except for the weight. The one product that has intrigued me is a plastic material that is made for basements and foundation walls that are prone to water seepage. It comes in rolls and it has raised bumps. It is common in the concrete industry. Good luck and keep me posted on the coop.
David
Yeah, I've done some digging and came across this stuff made by J-DRain. There product is J-DRain GRS. Made for Green Roofs. The only thing is that these come in a 4'x50' roll. Way more than what I need and the cost is a bit over 200 bucks. I only need about 90 square feet. So now I'm thinking of doing gravel like you did but I'm a little concerned with the weight. When I spoke to J-Drain she did tell me that Lowes carries something like what they make but under the name NDS. I did a google search but came up with nothing. I'm going to go to Lowes to check it out. I'll keep you posted.
ReplyDeleteThat renovation plan is nice, with the right choice of plants, that green roof will be successful, I guess. Good luck on your Eco-friendly project!
ReplyDeleteIt's been a while since this project has started, and it would be nice to know how it is doing now. I'm sure the roofs are now greener than before. It would be great, though, if you share some updates of that green roofing project of yours. It must be a success. Congratulations to everyone who made this possible.
ReplyDeleteYes, I too would be very interested in how things turned out, What a great project. Thank you for the excellent photos. Your descriptions have helped me feel like this is possible to do myself. I will be adding a green roof to my 10x12 shed.
ReplyDeleteI honestly think this a fantastic idea, I hope and pray that this is still in your own interest and what not. Make sure that you follow safety precautions before roofing it, is all!
ReplyDelete-Keystone Contracting Corp.
Roofing Contractor New York
i read that if the roof pitch is over 20 deg the drainage layer isn't necessary. What are your thoughts? I am to build a workshop 20'X20' with a pitched roof so would be interested to know if anyone has has much success without it. I do like the rubber bark idea though. Thanks Paul (UK)
ReplyDeleteWow!! this is great idea of green roofing over grill shed i also used this on my Garage shed. Hope it looks very attractive to watch and also help to cooled from inside. Green roofing also helps environment and increase the value of property. So i am ready to take part in this noble cause and help the world to get rid of global warming.
ReplyDelete