Showing posts with label bird houses. Show all posts

Tuesday, May 20, 2014

A lot going on in the garden...

Spring is such an exciting and ever changing time in the garden.  This year is no exception.

New birds are arriving daily, others are nesting, including red breasted nuthatches, northern flickers and black capped chickadees.  All the nest boxes have cameras, and as the action heats up I will stream live video form each (now we are streaming from inside the nuthatch box http://www.ustream.tv/channel/red-breasted-nuthatch).

Just yesterday, 3 nuthatches hatched.  Here is a short video of them getting one of their first meals.

And of course, I have been busy with garden projects.  Here are some photos of what is happening now and some updates on projects...
Featured prominantly on the wall of my shop- I keep a list to remind me of the projects I want to complete.  
This floor grate was an early one on the list (I made it this winter from old wrenches) and replaces a dilapdated, temporary wood grate I made several years ago.  Beneath the grate is our compost furnace.
The greenhouse is really filling up.  

And so is my little nursery.
I have been growing these sedum (Sedum lanceolatum)  for a green roof on the chicken coop I will be building...
The coop will occupy this space- the corner raised bed in the vegetable garden that gets too much shade to be really productive.
In the meantime, these shovel chickens enjoy the space.

In what has become a rite of spring, we moved our composter.  This change was set into motion by our new back gate, and fence rearrangement, that was prompted by storing our camper in the garden (click here for my wife's blog about our camper- a project in itself)


It fits right in. 
My plan is to build a pergola over it.  On the list.

 New garden furniture has been on the list for some time. And this winter I made a lot of progress. 
 Several new shovel chairs and benches replaces our dilapidated bent willow chairs.
 Even the birds got new furniture- a new bird bath to match the chairs and gate.

Saturday, July 9, 2011

The red breasted nuthatches are close to fledging: this is plain adorable

Make sure your volume is turned up when you watch the quick little video.

The red breasted nuthatches in the backyard nest box are growing quickly and they will soon fledge.  This was the nuthatches second attempt at a clutch. For whatever reason, the first clutch failed, but it looks like these little fellas are doing well.  A few years ago a pair of red breasted nuthatches had three failed attempts, but finally on the fourth try, all the nestlings fledged.  The adults were noticeably smaller and really haggard after building nests and finding food all spring and summer for four different clutches.  Watching that whole experience all spring and into late July gave rise to the expression my wife and I have- "we can all learn a lot from the nuthatches."

OK, I couldn't resist, here is another video.


Wednesday, May 4, 2011

Nuthatch and chickadee nesting update

The red-breasted nuthatches completed their nest, and apparently have begun incubating eggs.  Today the female remained in the nest and the male visited regularly to feed her.  He also spent quite a bit of time smearing sap around the entrance to the nest (shown above). This behavior is characteristic of the red-breasted nuthatch, but several nuthatch species perform tasks that help keep their nest free of pests and parasites.  For example, white-breasted nuthatches with scrape the outside of their hole with bad smelling insects to dissuade intruders. 

The female will incubate the eggs for two weeks, so around May 18th the young should hatch.

This year we installed a camera on the outside of the nuthatch box, and we will stream it when things get interesting.  Next year, we'll probably move that camera inside their nest box.  

The chickadees are just about done with their nest construction and similar to the past, it is made mostly of squirrel fur, and some antelope hair.  The female has been roosting in the nest box for the last couple of nights, and I suspect she will begin laying eggs anytime now (if she has not already).  Unlike the nuthatches, we have a live streaming camera inside the nest box- click here to see what is going in inside 24/7.

Tuesday, April 26, 2011

This is what happens at the nest box while I'm at work...


So, I've always wondered what goes on when I am not watching.  That is one of the reasons we installed nest box cameras in the flicker and chickadee boxes.  In order to see if anyone is checking out the boxes for nesting, I devised what I call a NIB (Nesting Indicator Bar), some might call it a twig.  I install the NIB in the entry hole of the nest box, and if it gets removed, I know something has been exploring the nest box.  So, when I leave for work, the NIB is in place, and when I get home, it is gone.  Sure, I know something has been in there, but what happened?  To figure this out, I recently installed a motion activated camera in front of the nut hatch box.  For eight years or so red breasted nuthatches have been nesting in this box, so I assumed that every time the NIB is gone, it is because a nuthatch took it out.

In the end I was right, but if you watch the slide show, you'll see a lot more happens.  Watch closely and you'll see that it begins and ends with a nuthatch on the box and excavating, but in between it gets visited by a black capped chickadee, a northern flicker, a house sparrow, my neighbor's cat and a squirrel.  Let's just say, that squirrel, isn't going to bother the nuthatches.

By the way, the nuthatches have excavated the box, and are just about done filling it with nesting materials.

Saturday, April 9, 2011

Black capped chickadee nest box excavation in full swing!

The Black capped chickadees have been really actively excavating the nest box in our backyard today.  Click on the above video for an example, and follow along as they complete the cavity excavation, build a nest and raise some chicks.  Stay tuned, and follow all the action on the nest box camera by clicking here.

Thursday, April 7, 2011

Chickadee Nest Box Camera is Live!... sort of

Camera installed in the chickadee nest box- this photo is from 2010.
The black capped chickadees have done a lot of excavating- including removing enough saw dust to reveal the camera inside of their nest box.  So, now I will start streaming video from inside their nest box - at least most of the day.  It is probably not going to be too interesting for a while (I suspect for the next few days you will just see sawdust), but stop by the nest box and check out the activity as the chickadees complete their excavation and start building their nest.

Here is the link to the broadcast of their nest box.  And, just to warn you again, it will just look like sawdust for a while, it is still pretty early, but I can't help myself.

It was really incredible watching the nest box cameras last year, and if you visit the the website you can see recorded videos from last year.  You can also read more about the cameras I installed in some posts from last year by clicking here, here and here.

Below is a little example of the chickadees getting fed last year, and an example of what is in store from the camera this year.

I also have a nest box camera in the northern flicker box, and once the flickers excavte the box enough to uncover the camera, I'll stream that, too.  So, stay tuned- it should be an exciting spring.

Saturday, March 19, 2011

Spring Cleaning in the Garden


(Special Guest Blog by David's Wife)

Spring is here and what better way to celebrate than by puttering around in the garden? It’s a good time to see actual plant growth (the new leaves are almost here) and do some tidying up. Here’s a recap of our Big Garden Clean Up Putter over at Home ReSource.

Sidebar: you may recall that David and I designed and installed the native plant landscaping at Home ReSource as volunteers. We think the world of HR and want the landscaping to reflect their mission of sustainable living.


Our tasks for the day:

  1. Pick up trash that had been hiding under the snow
  2. Trim back shrubs for better shaping
  3. Use the trimmed branches for creating (or reinforcing) brush piles for wildlife
  4. Install birdhouse
  5. Repair a bird bath

In the above photo, David installs a bird house above a landscape island in which the trash has been removed, shrubs trimmed, and a brush pile created. It went really well. If you live in Missoula, this is the time to clean up. It was fun seeing the staff at HR and they provided us with some good natured high school kids who were working off a community service requirement. So the whole thing went quickly and easily.

Here’s some more detail.

Step 1: Self explanatory. It’s depressing when the snow comes off to see how much crud was hiding under there for months. But it’s really satisfying to throw it away. Another positive note: David found my Leatherman Mini under some snow. I didn’t even realize I had lost it. Thanks David!

Step 2: David trimmed back unruly branches of Wood’s rose (it just makes them stronger- top photo) and snowberry (just for shaping purposes- bottom photo).

A few wayward branches of chokecherry, shrubby cinquefoil and Ponderosa pines got cut too. I want to stress that this trimming is for aesthetic reasons. Of course, these native plants do just fine out in the world without gardeners showing up to trim them. But when we use native plants in a landscape setting, it is perfectly reasonable to impose a little bit of order on them.

Step 3: The high school kids and I took all the branches and piled them for brush piles. These are nice little refuges for ground feeding birds, insects (like butterfly chrysalises) and who knows what else. There isn’t really any way to mess up a brush pile, but David has directions on his website: http://montanawildlifegardener.blogspot.com/2009/04/build-brush-pile-for-wildlife.html

Here’s one of the new brush piles, near Wyoming Street.

Soon creatures will be piling in there for refuge from all kinds of things (weather, stray cats, hungry birds). You know who loves a good brush pile?

The Mourning Cloak, Montana’s state butterfly. It spends the whole winter as an adult, stashed away in a brush pile somewhere.

Step 4: Install a bird house. If you want birds to nest in your yard this spring, PUT UP YOUR BOXES AS SOON AS POSSIBLE. Birds are looking for nest sites now. Read more at

http://montanawildlifegardener.blogspot.com/2009/02/birdhouse-basics.html

Here’s David installing a nest box above the parking lot at Home ReSource today. It’s mounted about 9 feet off the ground and facing east. It could be used by chickadees, nuthatches or wrens.

If you haven’t put up a bird house yet STOP WHAT YOU ARE DOING and go over to Home ReSource, because they sell bird houses for native species made entirely out of recycled materials. They even come with sawdust (for stuffing the box, making it nest-y-er for birds) and an instruction sheet.

They have a lot of great garden items over at the Home ReSource ReVamp Store. In addition to bird houses, they have Mason bee houses, a big garden cart, and creative toys for the kids to play with outside (stick horses by Josh Decker).

Step 5: Repair the bird bath. Last summer David installed a bird bath made from a re-purposed light shade, and connected to the drip irrigation system so it was always fresh and full. Unfortunately the glass bath didn't survive the winter, so he made a new one. Also out of glass. We'll see how it goes. Bird baths are one of the best things you can provide for birds, especially in winter.

As you can see from the photos, it was a pretty grey day here in Missoula Montana. But it was fun to get into the garden and work. When you are up close with the plants, you can tell for sure that they are in fact growing.

We plan to have some clean up days at some other public native plant gardens around town, including but not limited to the 8th Street Pocket Park. So keep your eye out for updates, especially over on Facebook. Don't forget to LIKE us!

Sunday, January 30, 2011

It's time to clean the nest boxes; spring is almost here

I took a break from shoveling snow to do some annual cleaning of the bird houses. This is a post I write about annually, but it is always a good reminder.

For more information about cleaning details click here and for more information about bird houses click here, and for some general bird stuff on this blog click here

Bird nest boxes need to be cleaned and inspected annually. It is a good time to look for water damage, and a good opportunity to inspect the boxes to see if they need any other repairs. At the minimum, remove the old nesting material, scrape off any mildew, and repack if you will be packing the house with saw dust (see here for more information).

I used to clean and re fill them right after the nestlings would fledge, but now I usually wait until early February to clean and refill the bird houses. I don't know if it is because of wisdom or laziness.

If left empty through the winter, birds may use the empty boxes as roosts. For example, this winter when we had several days below -10 F, flickers roosted in the flicker box and chickadees roosted in the chickadee boxes. However, in the past, squirrels have roosted (albeit temporarily) in the flicker box. But let’s just say that squirrel won’t be telling any of his friends about that warm spot to spend the night. Anyway, I digress, another reason to leave them empty after the nestlings fledge, is that our chickadees typically have two clutches and they will build their second nest right on top of their first nest.

Nevertheless, the sooner you get them repacked, the sooner you can watch for excavation activity. It is always amazing how quickly they start checking out the boxes, especially if we get a few warm days, and the little birds' thoughts turn to love.

Here are some important dates on nesting activities in the Missoula area from my backyard:

Red-breasted nuthatches are the first to begin excavating their selected box- they begin excavating in early to mid February (between February 5 and 21 at my house) and they are usually complete by the first week of April (April 1-9) when they begin to fill their boxes with nesting material.

Black-capped chickadees start excavating about a month after nuthatches, with peak excavating around first week of April (from March 25- April 4), until middle April when they bring in nesting material (April 11-15). But they investigate and start defending nest sites in February.

Northern flickers are on a similar schedule as chickadees and they begin excavating in late March – early April (March 24-April 8), but they search for nesting locations in February and may do some exploratory excavating as early as the beginning of February.

Wednesday, July 14, 2010

Flicker fledging has begun!

Here are just a couple of pictures and a short video of the fledging progress. Once they fledge, I'll post some more information and pictures, as well as some videos, including some time lapse videos of the fledging. Above is a young male contemplating fledging and below is a female doing the same.
Although we have flickers, nuthatches and chickadees nest in our yard almost every year, the interesting thing this year was the addition of nest box cameras (see photo below).

Click here to watch the nestlings inside of the nest box, if they have already fledged, you can still watch videos of the whole process on Ustream. I captured videos almost every day to document the process.
And here is a not very good quality video I took from inside my house but it shows what is happening outside the box for those that have been watching the flickers online from inside.


Stay tuned for more.

Friday, June 4, 2010

Nesting, nestling and fledging update

There is a lot going on with nesting birds in our garden. We have northern flickers, black-capped chickadee, and red-breastered nuthatches in various stages of nesting and fledging in nest boxes in our small backyard. Here is a breif run down on the actvity....

Black- capped chickadees

The chickadees should fledge any time now- they are ready to go but have probably been delayed by this rain. By the way, thank goodness for the rain!

If you haven't done so already check out the inside of the nest box with our streaming nest camera. But you'd better hurry because they are about to fledge. Click here to go inside the nest box.

At the beginning of this posts is a short video my wife took of the outside of the box and one of the adults feeding the young. For those that only know the chickadees from the inside of the nest box, this view might be interesting.

One thing I am really excited about is that we will be able to capture the mysterious second clutch this year on camera. every year, the chickadees have a second clutch, even after a typically very fruitful first clutch. The second clutch is usually smaller, and takes less time to fledge. It has aways appeared that the young from the first clutch help in raising (or at least with the feeding), the second clutch. Hopefully, though we'll be able to learn a little more of what is going on. It is not really common that chickadees have two clutches, so I am excited to learn more.

Red-breasted nuthatches

These little fellas have been a bit overlooked this year, I am sad to say. Not that they care, but theirs is the only box in which we did not install a nest cam. As a result, we have been so focused on the chickadees and the flicker business, that these little guys have been almost ignored (not really, but relatively). Anyway, they should be fledging any day now, too, but without all the fanfare. One interesting thing to note with these nuthatches, is that there are nuthatches nesting in the nest box I installed at the 8th Street Pocket Park, which is just a block away. Every so often these two nuthatch factions defend their little territories, which is kind of neat.

Northern flickers

Wow, they have had an eventful spring. Here is a little story of their spring...
  • They excavated out nest box
  • They also excavated a cavity in a silver maple in front of my neighbors house
  • They laid eggs in the cavity in the maple
  • European starlings evicted them from their nest
  • The starlings are nesting in the tree
  • The flickers left the area
  • Last weekend the flickers returned to the nest box, and as of yesterday (June 3)have laid at least 2 eggs (in the photo below- kind of poor qualiy but it is a video capture).


I hope they can raise a clutch- it is getting late for them.

Once the chickadees fledge we will switch to the flickercam for nest box viewing. Exciting.

Sunday, May 9, 2010

The flickers are not nesting in the garden...

The flickers are not nesting in the garden...and I couldn't be happier. A puzzling statement to be sure, so let me explain...

We began about 10 years ago with nest box for northern flickers. These common, primary cavity nesters are facing many problems from loss of nesting habitat to pressures from invasive species (see here). In order to address the first issue we set up a nest box. This was very successful and effective, and based on how quickly they found the box and occupied it, it is obvious they are looking for, and are limited by, places to nest.

In front of my neighbor's house are decadent silver maples (see above), that you'd think would offer great nesting habitat for flickers, and they do, but unfortunately the cavities get occupied by squirrels instead, and have been for the 10 years we've lived beside them.

But it appears that this year the flickers will finally be nesting in one of these decadent trees and I couldn't be happier.
They did excavate our nest box (see photo at the top of the post), and I thought they were going to nest in it. But at the same time, they also excavated a cavity about 30' up one of the silver maples (photo above, arrow acknowledgement: Bike Garden), perhaps our nest box was a back-up for what inevitably happened when flickers tried to nest in the maples- squirrels would occupy the cavity. But maybe not this year.

Unfortunately wildlife gardening in an urban- or sub-urban setting is not just about planting the right plants and putting up nest boxes, unfortunately it is really about introduced pest management. The primary exotic pests here are starlings, house sparrow and squirrels. Controlling pests is not the most glamorous part of having a wildlife garden, but it is perhaps the most important.

In order to combat these invasive species, we have done several things- making the garden less hospitable for them is the first step , but then there is also control, or killing (click here for more information). As far as making the garden less hospitable, that starts with feeders and nest boxes (click here for information about lessening bird feeders), and native plant landscaping (see virtually any post on my blog for this thought!). Both feeders and nest boxes need to be designed for native birds, so no perches, only food they eat, and really very few feeders, and only seasonal ones (click here and here for more information).

Since we stopped feeding with sunflower seeds, we have seen the number of pests decline dramatically in the garden - including US native, but not Montana native, house finches, which essentially disappeared from the yard. In the summer, spring and fall, there is so much natural food, much of which we have planted, feeding is not important and mainly attracts unwanted, or invasive birds and animals, and it also causes unnatural high congregations of birds, that make them susceptible to other pests, like cats (click here for my thoughts on this).

Secondly we only use nest boxes that are appropriate for native species that we are likely to attract, not bluebird boxes for example (read more here).

Third there is control or killing squirrels. In our garden we have a trap set up, and any squirrel I trap, I kill. This started several years ago, and I went from over 200 squirrels/ year down to fewer than 20 last year and this year will be even fewer. As a result, we have seen birds use the garden much more often and differently than when squirrels patrolled the grounds. And most importantly, birds like northern flickers might just nest in natural places now. Like I said, this is the first year that I am thrilled the flickers will not nest in our garden- perhaps the greatest accomplishment in our wildlife garden so far.

Sunday, May 2, 2010

Nesting and Nest Box Camera Update

This was an exciting weekend for the nest box cameras. All three of our nest boxes have birds- northern flickers, black-capped chickadees, and red-breasted nuthatches. New this year, the flicker and chickadee boxes have nest cameras, including streaming the chickadee nest cam! The flicker cam will be streaming next. Here is the link to the streaming video of the chickadee box, though not much is going on during the day, but in the evenings and mornings a lot happens.

I installed the cameras and then packed the boxes with sawdust (click here for a description). This weekend, now that the boxes had been excavated, my wife and I focused the lenses and adjusted the camera angles, though based on the quality of the chickadee camera's video, we might need to do some more lens adjustments.

The photo above shows the chickadee nest box, camera, and the freshly excavated cavity filled with moss and squirrel fur. Based on the female's nest construction (see the video below), it looks like she will be laying eggs soon, then the real excitement begins.

Here is link a short video taken this evening of the female burrowing in to the nesting material to carefully create a pocket for the eggs.

Thursday, April 29, 2010

Nesting and bloom update

Wow. Things have changed in the garden. I was out of town for week and when I got back I was amazed how quickly things change this time of the year. Suddenly I feel like there is so much to do in the garden, and suddenly I am so far behind. Here is a brief update of the goings on...

It appears that everything has leaves, buds or flowers on it now; below I list what is in bloom.
Nesting Update
  • the chickadees are bringing nesting material into their box (click here for my favorite nesting material combo- squirrel and moss).
  • The flickers evidently completed the excavation of their box all while we were gone.
  • The mystery this year was what was happening in the nuthatch box? The nuthatches "claimed" this box early on, but then some chickadees began excavating it, and pretty regularly. And there was no sign of the pair of nuthatches. Were these the same chickadees that were also going to nest in the normal chickadee box? And who's ever heard of 2 pairs of chickadees nesting the same yard? Craziness- they need a couple of acres because of competition for food. But now, all has been revealed- the nuthatches have returned and they are now nearly completely done excavating their box.

Once they finish excavating they will probably continue their tiny onslaught of my bent willow furniture- shredding off the bark into fine nesting material for their little, freshly excavated cavity. Then they will carefully line to opening of the box with sap- lest I try to get back said components of my bent willow furniture. Order has been restored.
Bloom Update:

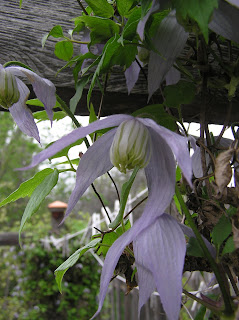
Flowering now- arrowleaf balsamroot (Balsamorhiza sagittata ), golden current (Ribes aureum), blue bells (Mertensia oblongifolia ), larkspur (Delphinium bicolor ), Jacobs ladder (Polemonium pulcherrimum), biscuitroot (Lomatium triternatum and L. dissectum), violets (Viola canadensis ) pasque flower (Pulsatilla patens), cutleaf daisy (Erigeron compositus, pictured above), blue virginsbower (Clematis occidentalis, see photo at beginning of the post of the virginsbower on my clothesline), prairie smoke (Geum triflorum), blue eyed mary (Collinsia parviflora, see below- this is one of my favorites, and it makes a nice groundcover), sivery lupine (Lupinus argenteus ), kittentails (Synthyris missurica ), Oregon grape (Mahonia repens ), and many more species flowering every day that it is hard to keep up.

So much to do. Last weekend I removed a little remnant lawn patch that I have had my eye on to turn from lawn to what I call a mowable prairie. In the lawn's place I planted natives that can be mown and maintained- like a lawn was originally intended- a meadow that could be mown to a height that would allow for paths and play areas. Instead of a lawn or a water hungry meadow, I planted this with drought tolerant, trample resistant natives like yarrow (Achillea millefolium ), hairy golden aster (Heterotheca villosa), mixed aster and erigeron species. After planting starts and transplants in the mowable prairie area, I covered the whole thing with mulch, but not just any mulch, gentle reader, a special mulch... this mulch is made from seed heads and flower parts I cut off last fall and kept in a bag out side all winter (cold stratification). Then I carefully (read: not at all) applied it to the surface of the fresh bed. I've found that with hairy golden aster, and my bag of assorted asters (by assorted I mean I can't really tell the difference between most asters and erigerons in my garden), they do great germinating when laid down in a mulch. I have been waiting for rain to do this, and by golly the rain has finally come (hopefully it will continue for a little while).

I did have a chance to also plant my potatoes, beets, peas, and other things I am probably forgetting and I finally built a new raised bed- for onions (see below, with cat guard installed), I moved the hill that was in its place and potted up all the asters and such that were on the hill. Maybe this weekend, I'll plant those potted up plants into the front yard or fill in other places in the yard.
Now I am well on my way to completing my 2010 garden project list (click here for this list). According to the list, the only thing left is making a new composter, but in reality, the list has really grown...

Lots going on suddenly, more updates with pictures to follow, oh and, a new arrival to the garden yesterday, a golden crowned kinglet.

Monday, February 15, 2010

Spring cleaning for the nest boxes

Spring is nearly here, though the calendar does not say it, and the groundhog evidently begs to differ. Nevertheless, some of the first signs of spring are apparent; black-capped chickadees are singing their lovey-dovey "cheeseburger"song, the smell of road-killed skunk (ahhh, spring), and a mourning dove in our yard today. Soon robins will be back, and spring will be here in earnest. Or not- it is February in Montana after all, but I digress. Anyway, I'll return to thoughts of spring...


February is an important time to think about birdhouses. The following post contains some information about nest boxes I wrote in a post about the same time last year "Bird house basics". February is when birds begin courting and looking for nesting places. Having a bird nest and raise its chicks in your yard is very gratifying for wildlife gardeners.

Since I like to keep the nest boxes empty in the winter so many birds will use them as roosts in our yard as a way to escape the cold (see here). Now is the time to clean and refill the nest boxes and it is a fun annual rite of spring (that along with connecting my rain barrels to our downspoutsm,, but that will have to wait, a while). This year the added bonus are tiny cameras I am going to install and hopefully post pictures or streaming video to this blog. This also is the first item on my 2010 to do list I can cross off, and an exciting one.

Although it is fun to see birds nest in your yard, there are many things to consider before hanging a birdhouse. Know what species of bird you want to attract and have reasonable expectations (click here for more information). In our yard, red-breasted nuthatches, black-capped chickadees, and northern flickers are the ones we are most likely to attract. Since they are cavity nesters (that is, they nest in hollow spaces in dead trees), they require box-like houses that simulate tree cavities. The reason I encourage people to cater toward cavity nesters is that these birds are having a tough time, from habitat loss, loss of snags (nesting sites), to competition from invasive birds (typically secondary cavity nesters). Although chickadees, nuthatches, and northern flickers will nest in an empty box, they prefer to excavate the cavity themselves, because this assures a clean home free of pests and predators.

Red-breasted nuthatches are the first to begin excavating their selected box- they begin excavating in early to mid February (between February 5 and 21 at my house) and they are usually complete by the first week of April (April 1-9) when they begin to fill their boxes with nesting material. Yesterday (Feb 15), I watched as a pair started excavating.

Black-capped chickadees start excavating about a month after nuthatches, with peak excavating around first week of April (from March 25- April 4), until middle April when they bring in nesting material (April 11-15). But they investigate and start defending nest sites in February.

Northern flickers are on a similar schedule as chickadees and they begin excavating in late March – early April (March 24-April 8), but they search for nesting locations in February and may do some exploratory excavating as early as the beginning of February.

As far as cleaning the boxes and refilling, below are some pictures from a chickadee box and flicker box. In the photo below, the lid on the nest box is opened to reveal the excavated cavity. Here you can see how they removed a lot of material, but still left many packed wood chips. This is why it is important to tightly compact the chips.

Here I removed the nest, and the portion of wood chips that covered the top of the nest, you can see they excavated about 1/2 of the box.Here is the nest removed form the box. Chickadees and nuthatches will add material for their nests. Whereas chickadees use animal hair, fur, and moss (this as I have mentioned is the best use for introduced squirrels), nuthatches will shred up bark into various layers of increasingly soft bedding, and they also smear sap on the outside of the hole to discourage insects and parasites from bothering the nestlings. It is really fun to watch them do this. You can help chickadees by providing fur ( for more information click here), animal hair or sphagnum moss in your yard for them. The nest is in two parts, a round egg area, and the base.Below are pictures of tree nests from past years, each are unique, based on the availability of nesting material, the age and experience of the builders, etc... They are all soft and adorable, though. You can even see a couple of eggs in one of the nests- this was from a the second clutch one year that evidently had poor germination (a little something for you gardeners).Here is the box cleaned out. This is a good time to inspect for any damage and do repairs. If there is any water penetrating into the box, fix the cause and let the box dry out before repacking. Although I build nest boxes from western red cedar, a naturally decay- and insect-resistant wood, which needs no protection from the weather, I fill my boxes with Douglas fir (typically chips from my thickness planer or jointer- see below), but you can use any species except cedar, teak, or mahogany. These species contain oils that prevent rot and insect damage but the dust can irritate nestlings. It is important to compact the chips, and I just use a piece of wood to pound it into submission. By compacting the sawdust, the birds can excavate a cavity without the rest of the filling collapsing on them.Normally that is it, but this year, I got a birthday present from my wife...mini cameras! These are the Hawkeye nature cameras (this is not a paid product endorsement, unfortunately). I removed camera shield, to take up less space, I hope this is not a fatal flaw. In adding these cameras, I did not pack the wood chips to fill the box completely as you'll see. The first step is to mount the little bracket, and my only tip here is to mount it, so it is loose enough to be able to swivel the bracket to screw the camera to the bracket. Here is the camera installed in the chickadee nest box, notice the grove cut into the side for the wire to pass.
Below is my northern flicker nest bow, and one thing to notice is that flickers just about completely remove all the wood chips for the box and they do not require any nesting material. although they may use an empty box, one benefit to having he house filled, is that is discourages use by non-target birds like house sparrows and starlings, which will not excavate. However, once the flickers excavate their nest box, often European starlings will follow. It is crucial to remove the starlings, their nests (they bring in nesting material), or otherwise dissuade them from taking the flicker’s nest box. Click here for more information about flickers and starlings.

Below, the camera installed in the flicker box. Plenty of roomHere is the completed, freshly refilled nest box with a camera, waiting to be excavated. If you look closely, you will see one of my own inventions on entrance hole- a Nesting Indicator Bar, also known as a "twig". I place these "twigs" in the entrance hole of all my nest boxes to monitor if birds are investigating the boxes. Kind of low-tech compared to the mini cameras.
Spring is near.